Written by The Strategy
As life in quarantine stretches out, many of us have found ourselves either panicking about how to maintain beauty tasks we normally wouldn’t do ourselves, or, attempting beauty feats we are completely unequipped to do. (We’re directly looking at anyone who has decided to cut their own bangs out of boredom.) The one area of beauty maintenance that has us panicking, is the maintenance of our regularly scheduled waxes.
We sat down with (read: exchanged e-mails with) one of The Ten Spots top aestheticians, Marijana Hasanac, to discuss how to maintain our waxes, without the aid of a trained hand.

Many people are concerned about coming out of this with either a solid unibrow or over plucked eyebrows. Without going to either extreme, what can we do to keep our brows in shape?
These days we are all relying on ourselves for maintenance. Once you have had your brows professionally sculpted and structured to suit your face at anytime, not just during a pandemic, you should do your best to keep them on point with a pair of tweezers. I love waxing because it cleans up every hair, but it’s the tweezing that gives me the shape and arch I am trying to achieve. The hairs you want to remove are the ones that have started to sprout as you see them. The area that everyone is mostly concerned about is between the brows. Focus on just removing a few hairs to keep up with the shape, and if you start questioning yourself about which hair needs to go, just leave it there. I also do believe in letting your brows do the unthinkable and let them grow. The longer the better as that lets you see your natural shape. I usually tell my guests to come anywhere from 4 to 6 week, if not longer for a clean up, because that’s how long a growth cycle usually lasts, meaning you never get the same hair growth each month, allowing you that time to achieve a fuller brow.
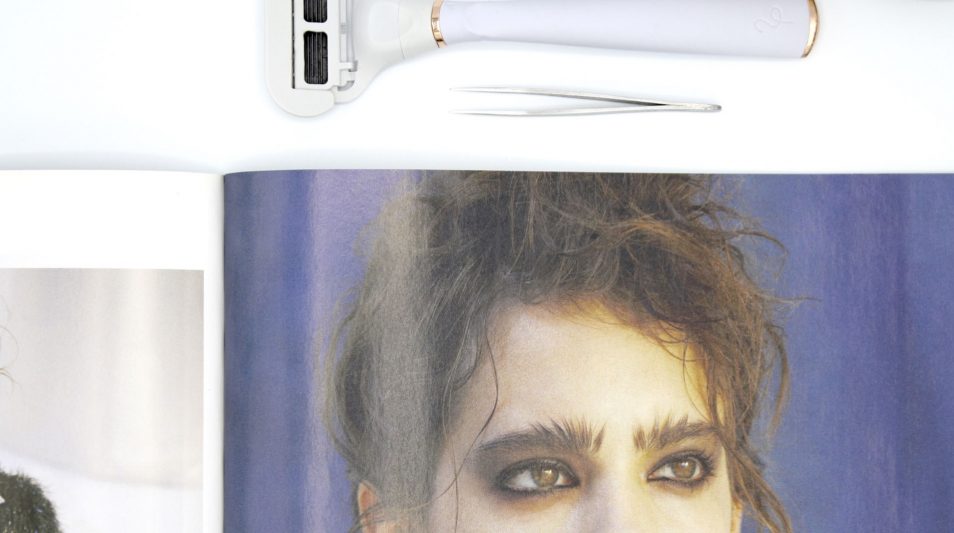
What tools should a person have in their arsenal for this?
Some tools that I have handy at home for any brow touch ups are my tweezer of course, a spoolie, scissors, brow powder, and most importantly natural light and absolutely no magnify mirror. I always start by filling in my brows lightly with brow powder to achieve the shape I am going for. I brush up my brows with the spoolie, and one hair at a time I trim only the very long hairs. This can become very tricky. If you don’t trust yourself, I wouldn’t do it because you can cut way more off then you wanted to. The only hairs I tweeze are the ones that have started to sprout, and I grab them in the direction of the hair growth while holding the skin taut. Lastly, if you are sensitive, like myself, and do not have any calming gels or lotions at home, just a cold compress on the brow area for five minutes to reduce the redness, irritation and close up the pores.
When it comes to at-home maintenance for the rest of your face, which is the safer option: small shavers or at-home wax kits? If neither, what would your suggestion be?
I have never been fond of shaving anything on the face. I feel it irritates the skin and just makes all the hair growing back super prickly. I suggest at home wax kits for small areas on the face, that you can find at your local drug store. There are all different types of wax out there these days. My favourite is all purpose hard wax. The consistency you want is elastic and pliable. The area of skin that you will be working on must be cleansed from dirt, makeup, sweat and any lotions so that the wax can adhere to the area. Also, I don’t suggest anyone wax themselves at home if they are using retinol, retin-a, renova or any medication that thins out the skin. Make sure when dipping the wax stick into the pot that one side of the stick is clean of wax. Apply the wax in the direction of hair growth with enough pressure, and make sure to make a thicker lip on the end of the wax strip, that will help you remove the wax easier without it breaking on you. I don’t suggest going over the same area twice as you can remove parts of the epidermis. If any irritation occurs, I suggest a cold compress on the waxed area for five minutes – that will help with any redness, discomfort and it will close up those pores. A lot of the time, most of us will break out. Try not to touch your face, apply makeup or get sweaty, as this will clog the pores that haven’t closed up yet creating a breakout.

How would you suggest someone upkeep their below-the-belt waxes, when it is unclear how long it will be until we are able to resume waxing sessions?
The safest option is to just let it grow, trim it occasionally, then make an appointment at your local spa as soon as the salons open their doors, but if you cant deal with not being bare down there I suggest either try waxing yourself or my least favourite – shaving.
We’ve often heard that you shouldn’t shave your pubic area between waxes. Is there any other alternative or is shaving the only/best option?
It’s never worth shaving, no matter what. You spend so much time and money to thin out the hair in the area from waxing, and the reason why you probably started waxing in the first place was to prevent irritation and ingrown hairs. If you prefer it bare, then shaving is the best option for you. Before you start any kind of grooming, ask yourself “Is the burning, itchy, prickly feeling really worth it?” or can you just trim the sides and deal with the rest till we all go back to civilization.
Do you have any recommendations on how too have with minimal burn or irritation?
If shaving is your last resort and you want to prevent any razor burn or irritation, there are specific steps you must follow to protect and nurture your skin, especially if you are prone to irritation, ingrown hairs, and razor burn.
- Prepare your skin properly: You need to warm up your skin for the razor. Take a warmer than usual shower, as this allows the skin and hair to soften, which gives the razor the ability to cut the hairs cleanly and quickly. After you have warmed up the skin with the water, use shaving cream, as this acts like a protector between the blade and the skin, without compromising the closeness of the shave itself.
- Find the right razor: Buying the right razor is essential to preventing any irritation or razor burn. Also, replacing your razor blade regularly is key. Never use a razor blade more then 8-10 times. The blade becomes dull and collects too much bacteria, even if you have been storing it properly after each use.
- Time to shave: Whatever area you will be shaving, remember to shave against the grain of the hair growth. Don’t apply too much pressure either, because you will shear off extra skin, which causes irritation. If you are susceptible to ingrown hairs, I suggest switching up the direction and shave with the grain of the hair growth.
- Calming the skin: After you have finished shaving, cool the skin down. Run the water a bit cooler; this will close up the pores and calm any irritation.
- Exfoliation: A few days later, it is important to exfoliate the shaved area. This is a crucial step to any type of hair removal. It should be done 2-3 times a week. Exfoliation helps remove the dead skin that builds up. If you don’t remove these layers, ingrown hairs occur, and these are difficult to get rid of. There are a few products I recommend for exfoliation. My ultimate favourite is a dry brush. These brushes can be used before or after a shower. They remove dead skin cells, stimulate circulation for proper hair growth, and help eliminate body toxins. I suggest replacing the brush every 3-6 months. Dead skin accumulates on the brush and its just proper hygiene practise. I also suggest, if you are not one for manual work, is a liquid exfoliant, which usually comes in a roller bottle. The main ingredient is lactic acid, which helps exfoliate the dead skin.
For those who are brave enough to try an at-home wax kit, what tips can you share on how to wax yourself effectively?
For those willing to wax themselves at home, I suggest not to bare it all. Focus on the areas that are exposed outside your bikini line. This will reduce the anticipation one experiences if you go more in depth into the pelvic area, which is the most sensitive. Waxing is quick, and can be relatively pain free when done correctly. If you have been shaving and want to start waxing instead, wait at least four weeks for best hair length. One way someone can check if their hair is long enough is if the hair is longer then a grain of rice.
Some tips for an effective at home wax:
- The bikini line must be clean and free of any lotions or sweat. The wax has to adhere to the area you are waxing. I suggest a warmer shower before hand, as this will help soften the hair and skin.
- Apply the wax in the direction of the hair growth, and remove it against the hair growth.
- Hold and stretch the skin you are waxing. This will prevent any bruising.
- If there are any sticky bits left behind, try to use a wax strip that has wax on it and go over it to remove the residue.
- I don’t suggest putting any lotions on after waxing, because they can clog the pores, but, if you feel any irritation, diluted pure lavender or diluted blue chamomile essential oil can be used to soothe the skin.
- Exfoliation is key a few days after your wax. This step will help prevent ingrown hairs.